Deploying Multiple WordPress Sites with a Shared Database Service in Docker Compose
Sharing how I deployed additional WordPress instances by reusing an existing MariaDB service in Docker Compose.

This post is another part of my personal learning notes, this time focusing on how I deployed multiple WordPress sites on a single low-spec VPS using Docker Compose and an existing MariaDB service. The approach I’m sharing is based entirely on what I’ve tried, tested, and implemented in my own environment.
It may not be the most perfect or the most optimized solution out there, but I hope these notes can be helpful for anyone working with a similar setup—especially those trying to maximize limited server resources. If you find areas that could be improved, I’d be grateful for any feedback or suggestions.
Why Use a Shared Database Service ?
Using a shared database service becomes almost a necessity when working with a low-spec VPS like mine, which only has 1 CPU core and 1 GB of RAM. I previously tried deploying multiple WordPress setups where each site had its own full stack—including its own MariaDB container—and the result was immediate: the VPS froze, services crashed, and everything became unusable.
Running multiple database containers is simply too heavy for this kind of environment. That’s why using a shared database service is the most practical and resource-efficient approach. It keeps the server stable, reduces memory consumption, and still allows each WordPress site to run independently with its own database and user.
Existing Docker Setup Overview
For this setup, I’m using a VPS from Alibaba Cloud, which only costs $9.9/year — a great deal for anyone starting out with self-hosted WordPress.
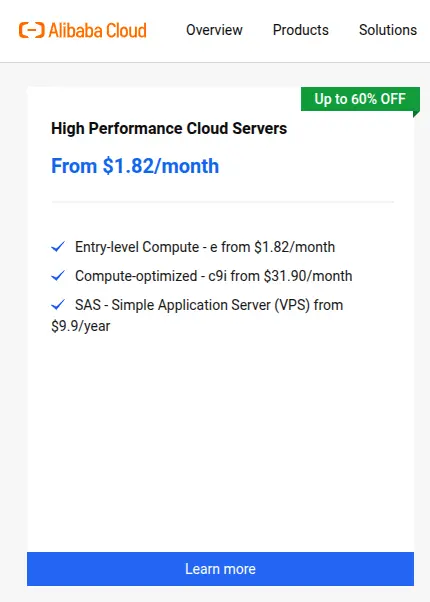
If you’d like to try the same server, you can check it out here.
I already have one WordPress site running through Docker Compose along with a dedicated MariaDB service. This setup has been stable and efficient for my needs, especially considering the limited resources of my VPS. If you’re curious about the full details of that initial setup, you can read my previous docker compose setup here.
Since the database container is already running and properly configured, it makes sense to reuse it rather than spinning up a second database instance that would consume unnecessary RAM. At this point, my Docker network, volumes, and database storage are all established — so the goal now is simply to deploy a second WordPress instance that plugs into the existing infrastructure without adding unnecessary load or disrupting the current site.
Create a New Database and User in MariaDB
Since we are reusing the existing MariaDB service, the next step is to manually create a new database and user for the second WordPress instance. This ensures that each WordPress site has its own isolated database while still sharing the same MariaDB container.
Start by accessing the running database container:
docker compose exec -it db bashOnce inside the container, log in to MariaDB as root:
mariadb -u root -pAfter entering your root password, create a new database:
CREATE DATABASE new_wp_database;Next, create a new user with a secure password:
CREATE USER 'new_wp_user'@'%' IDENTIFIED BY 'new_wp_password';Grant full privileges on the new database to the new user:
GRANT ALL PRIVILEGES ON new_wp_database.* TO 'new_wp_user'@'%';Apply the changes:
FLUSH PRIVILEGES;And that’s it — your new WordPress instance now has its own dedicated database and user, ready to be connected through Docker Compose.
Preparing Environment Variables
For better organization, I keep all related files under the /var/www2/ directory on my server.
Here’s the basic structure I’m using:
/var/www2/
├── php/
│ └── custom.ini
├── docker-compose.yml
└── .env
Before spinning up the new WordPress container, we need to prepare the environment variables that will be used by Docker Compose. These variables define the database name, credentials, and the port where the new WordPress instance will run.
Create or update your .env file with the following values:
# MariaDB Variables
MARIADB_DATABASE=new_wp_database
MARIADB_USER=new_wp_user
MARIADB_PASSWORD=new_wp_password

# WordPress Variables
WORDPRESS_DB_HOST=your_db_service_name
WORDPRESS_TABLE_PREFIX=wp_

# Expose Port Variables
WP_PORT=9001
Here’s what each variable represents:
- MARIADB_DATABASE — the name of the new WordPress database you created in MariaDB.
- MARIADB_USER / MARIADB_PASSWORD — the new database user and password assigned to this specific WordPress instance.
- WORDPRESS_DB_HOST — the hostname of your database container (usually
dbunless you renamed it). - WORDPRESS_TABLE_PREFIX — the prefix for WordPress tables; keeping it unique helps avoid conflicts.
- WP_PORT — the external port for the new WordPress site (e.g.,
9001), which will be referenced later in NGINX.
By keeping these variables in a .env file, your setup stays clean, reusable, and easier to manage when deploying multiple WordPress instances.
Docker Compose for the New WordPress Container
With the database prepared and environment variables defined, the next step is to create a new Docker Compose service for the second WordPress site. Since we are reusing the existing MariaDB service, this container only needs to run WordPress itself — no additional database service is required.
Here is an example configuration:
services:
  wordpress-second:
    image: wordpress:php8.4-fpm
    volumes:
      - /var/www2/wordpress:/var/www/html
      - /var/www2/php/custom.ini:/usr/local/etc/php/conf.d/custom.ini:ro
    restart: always
    ports:
      - ${WP_PORT}:9000
    environment:
      - WORDPRESS_DB_HOST=${WORDPRESS_DB_HOST}
      - WORDPRESS_DB_USER=${MARIADB_USER}
      - WORDPRESS_DB_PASSWORD=${MARIADB_PASSWORD}
      - WORDPRESS_DB_NAME=${MARIADB_DATABASE}
      - WORDPRESS_DEBUG=0
    networks:
      - wp-network

networks:
  wp-network:
    external: true
    name: www_wp-network
What’s happening here?
- No new database service is defined — the container connects directly to the existing database instance through the shared Docker network.
- Volumes map the WordPress application files and the custom PHP configuration.
- Ports expose the FPM container on
${WP_PORT}, using a different port from your existing WordPress site, allowing NGINX to forward requests to this specific instance. - Environment variables are pulled from the
.envfile for cleaner configuration and easier reusability. - The wp-network is marked as external, which means Docker will not recreate it; it simply joins the already existing network that both WordPress containers use to communicate with the database service.
If you’re unsure about the name of your existing Docker network, you can easily check it using this command:
docker network lsNGINX Configuration for the New Site
With the new WordPress container running on a different port, the next step is to configure NGINX so it can route traffic to this instance. The example configuration below shows how to set up HTTPS redirection, SSL handling (using Cloudflare in my case), and PHP-FPM forwarding to the new WordPress container.
#/etc/nginx/sites-available/wp2.yourdomain.com

server {
	listen 80;
	server_name wp2.yourdomain.com;
	return 301 https://$server_name$request_uri;
}

server {
	listen 443 ssl http2;
	ssl_certificate /etc/ssl/cert.pem;
	ssl_certificate_key /etc/ssl/key.pem;
	ssl_client_certificate /etc/ssl/cloudflare.crt;
	ssl_verify_client on;

	server_name wp2.yourdomain.com;
	root /var/www2/wordpress;
	index index.php index.html;
	set $docker_root /var/www/html;

	access_log /var/www2/logs/access.log;
	error_log /var/www2/logs/error.log;

	location / {
        try_files $uri $uri/ /index.php?$args;
    }

	location ~ \.php$ {
		try_files $uri =404;
		fastcgi_split_path_info ^(.+\.php)(/.+)$;
		fastcgi_pass 127.0.0.1:9001;
		fastcgi_index index.php;
		include fastcgi_params;
		fastcgi_param SCRIPT_FILENAME $docker_root$fastcgi_script_name;
		fastcgi_param PATH_INFO $fastcgi_path_info;
	}

	location ~ /\.ht {
		deny all;
	}

	location = /favicon.ico {
		log_not_found off;
		access_log off;
	}

	location = /robots.txt {
		log_not_found off;
		access_log off;
		allow all;
	}

	location ~* \.(jpg|jpeg|png|gif|ico|svg|css|js|otf|ttf|woff|woff2)$ {
		expires 365d;
		log_not_found off;
		access_log off;
	}
}
Key points to note:
- The new site uses a different server_name, such as
wp2.yourdomain.com. - NGINX forwards PHP requests to
127.0.0.1:9001, which corresponds toWP_PORT=9001in your.envfile. $docker_rootis set to/var/www/html, matching the document root inside the WordPress container.- Static assets are cached aggressively to improve performance.
- SSL configuration here uses Cloudflare certificates, but you can replace this with Let’s Encrypt or any SSL provider you prefer.
This NGINX block ensures your additional WordPress instance routes correctly, serves files efficiently, and connects to the correct PHP-FPM container.
Running & Verifying the Setup
With your database, .env file, Docker Compose configuration, and NGINX virtual host prepared, you can now start the new WordPress instance and confirm that everything is functioning correctly.
1. Start the New WordPress Container
From the directory containing your new docker-compose.yml, run:
docker compose up -dThis command will:
- Launch the new WordPress FPM container
- Apply all environment variables from the .env file
- Connect the container to the specified Docker network
Verify that the container is running:
docker compose ps -aYou should see the your new WordPress service listed.
2. Enable the NGINX Configuration (Symlink)
After confirming that Docker is running fine, test the NGINX configuration to make sure there are no syntax errors:
nginx -t

nginx: the configuration file /etc/nginx/nginx.conf syntax is ok
nginx: configuration file /etc/nginx/nginx.conf test is successful
Then, link your NGINX configuration file to the /etc/nginx/sites-enabled directory:
ln -s /etc/nginx/sites-available/wp2.yourdomain.com /etc/nginx/sites-enabled/If everything looks good, reload NGINX to apply the changes:
systemctl reload nginx3. Access the Site in Your Browser
Visit the domain you configured in your NGINX server block:
https://wp2.yourdomain.comIf everything is set up correctly you will see the WordPress installation screen
Final Thoughts
Deploying multiple WordPress sites on a single VPS with limited resources is absolutely possible — as long as the architecture is planned carefully. Using a shared database service is one of the most effective optimizations, especially for low-spec servers. It reduces overhead, keeps your containers lightweight, and prevents your VPS from freezing under load.
I hope this walkthrough helps anyone who’s trying to achieve a similar setup. If you have suggestions or improvements, I’d be happy to learn from your experience as well.